

Table of Contents Show
Automating routine tasks can save a tremendous amount of time and reduce errors. One of these tasks is generating and sending invoices.
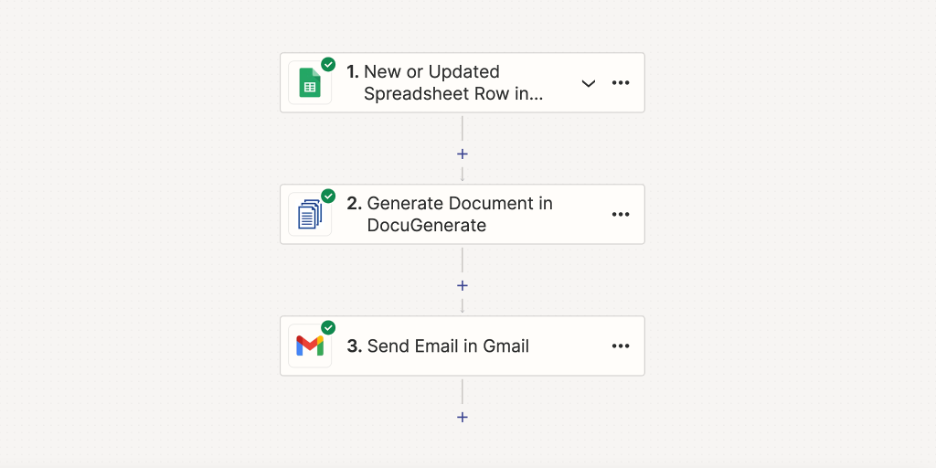
This blog post will guide you through the process of automating PDF invoice generation using Google Sheets, Zapier, and DocuGenerate. We’ll show you how to upload data from an Excel file to Google Sheets, set up an invoice template in DocuGenerate, and automate the generation and emailing of PDF invoices.
Importing Data into Google Sheets
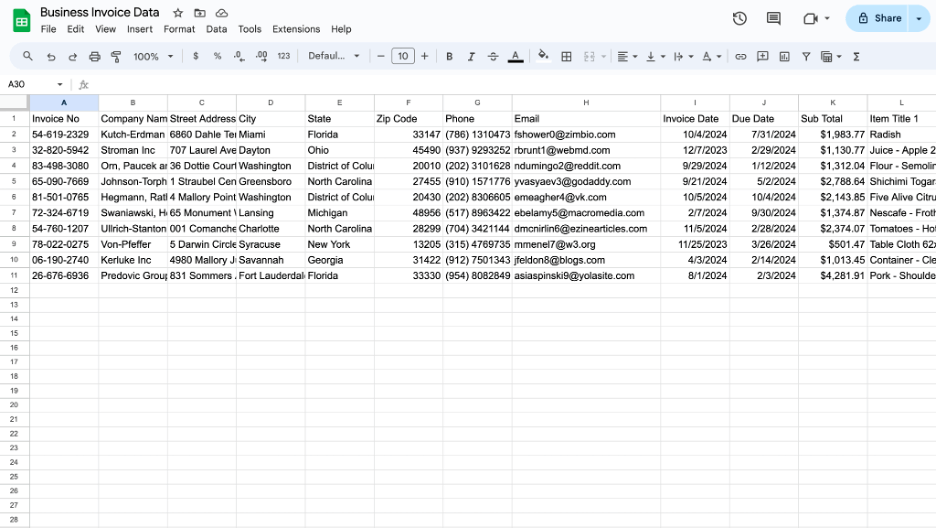
First, prepare your invoice data in an Excel file. This file should include columns for client names, addresses, invoice amounts, email addresses, and other relevant details. Having a well-organized dataset ensures smooth automation.
Next, open Google Sheets and create a new spreadsheet. Click on “File -> Import”.
Choose the “Upload” tab and select your Excel file. Follow the prompts to import your data into the new Google Sheet. After the upload is complete, you will see your data in Google Sheets. It’s a good practice to rename the spreadsheet to something relevant, like “Business Invoice Data”. This helps in easily identifying the sheet during the automation setup.
Setting Up the Google Sheets Trigger
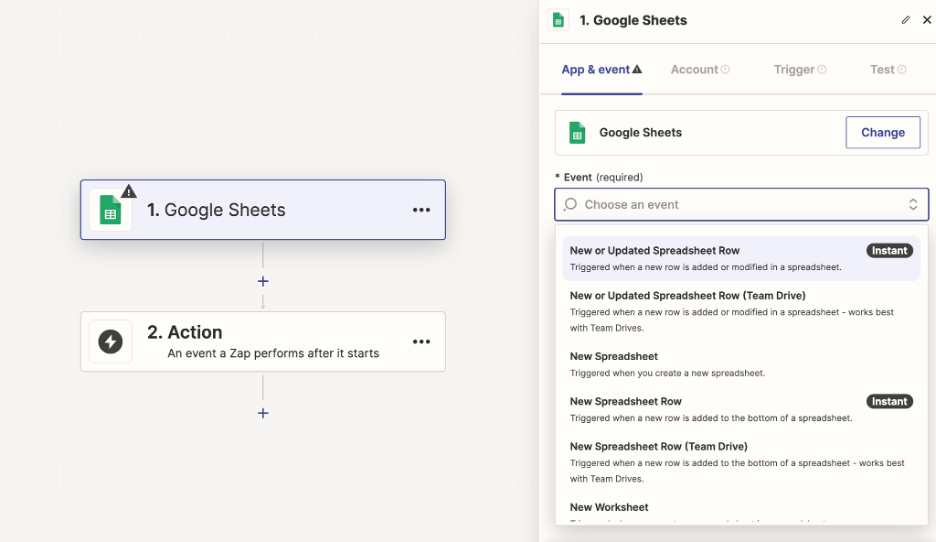
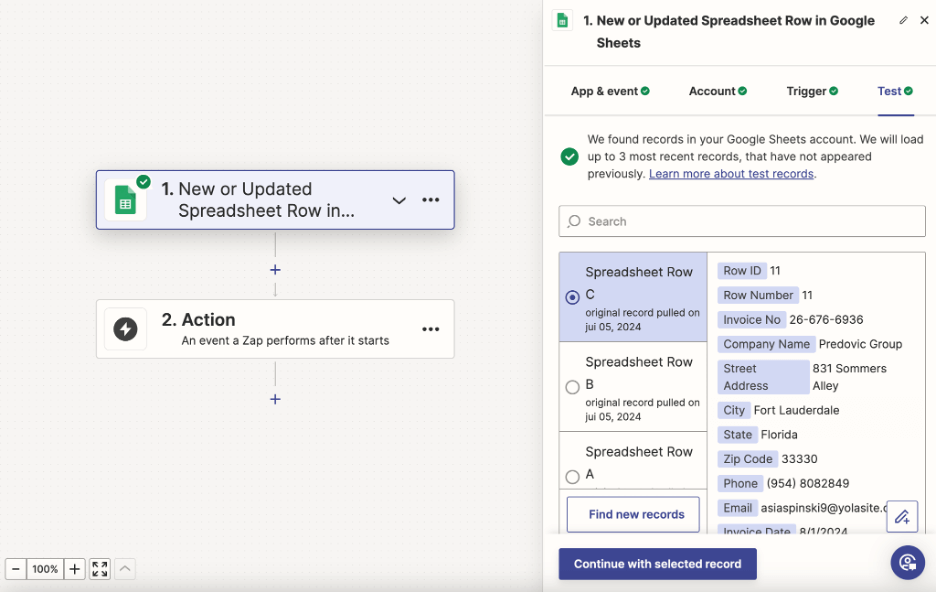
In Zapier, start by creating a new Zap, which is an automated workflow. Select Google Sheets as the starting app. Zapier offers various triggers; for this task, add the “New or Updated Spreadsheet Row in Google Sheets” trigger. This trigger will activate whenever a new row is added or an existing row is updated in your Google Sheet.
Connect your Google account to Zapier by following the authentication steps. Once connected, select the spreadsheet and worksheet where your invoice data is stored. This configuration ensures that Zapier monitors the correct data source. You can also specify if you want to monitor all rows or just new rows added to the sheet.
Featured Reading:
Creating the Invoice Template in DocuGenerate
Next, log in to your DocuGenerate account and create a new template using your preferred invoice format. This template can be a Word document or another format supported by DocuGenerate.
Make sure your template includes merge tags for the data fields you’ll be using, such as [Company Name], [Invoice No], [Invoice Date], [Sub Total], etc. These merge tags will be replaced with actual data during the document generation process.
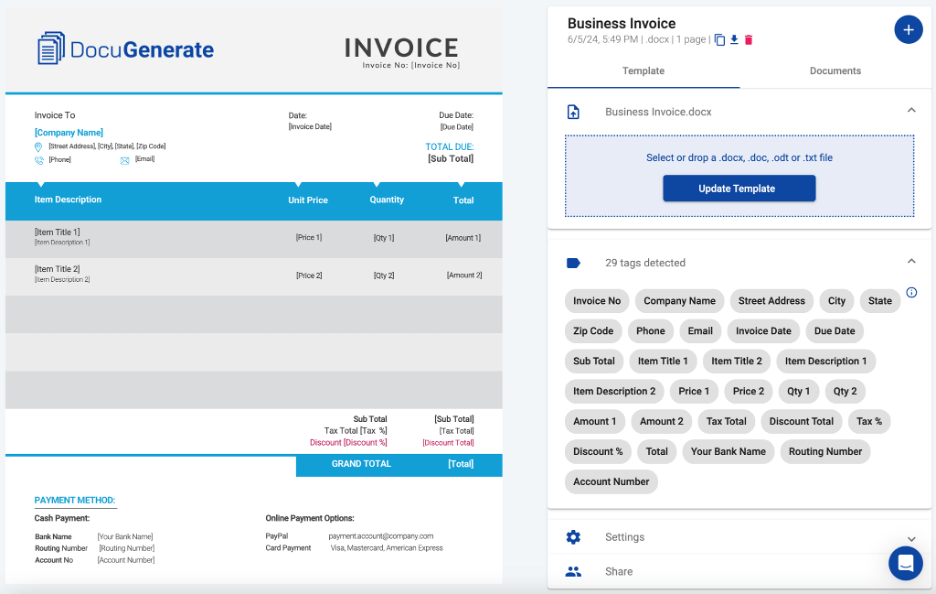
Upload your invoice template to DocuGenerate and configure it. This configuration involves specifying the merge tags that correspond to the columns in your Google Sheets data. For example, the [Company Name] tag in your template will be mapped to the “Company Name” column in your Google Sheet.
Setting Up the Generate Document Action
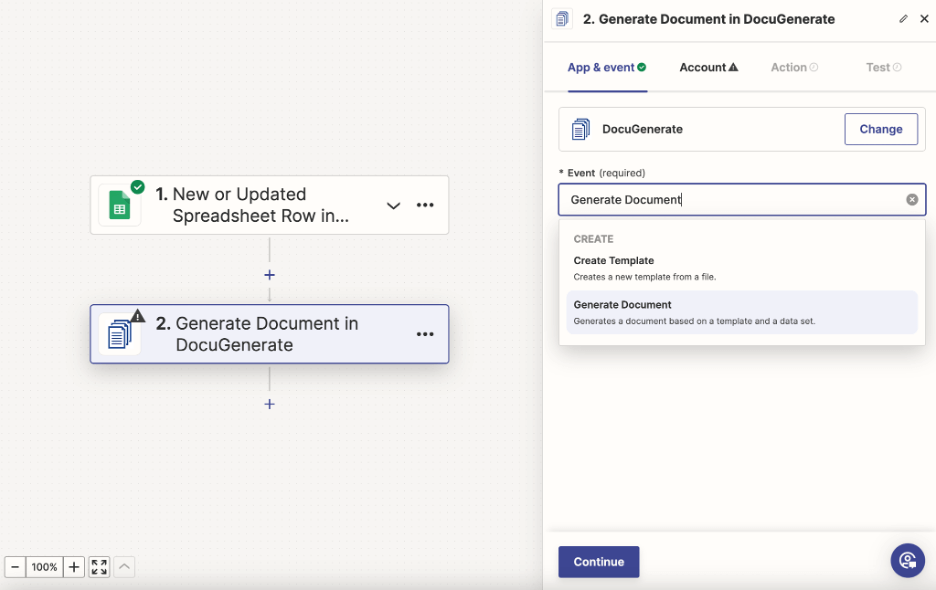
In your Zapier workflow, add the DocuGenerate app and select the “Generate Document” action. Connect your DocuGenerate account to Zapier by providing your API key. Configure the action by selecting the invoice template you created earlier.
Map the data from Google Sheets to the corresponding merge tags in your DocuGenerate template. Verify that each field in your template is correctly linked to the appropriate data source.
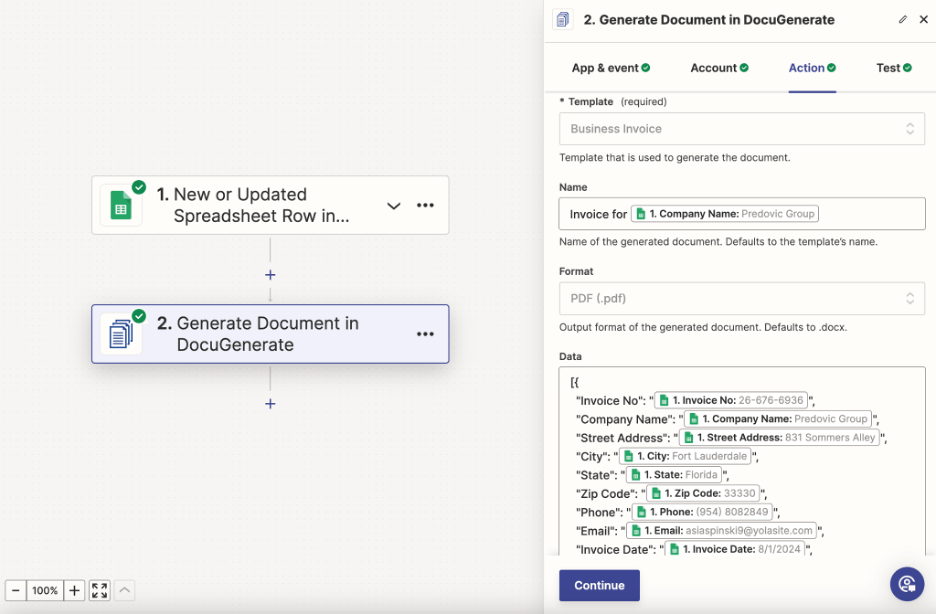
When setting up the “Data” parameter, ensure the JSON format is correct with double quotes around the values. Incorrect formatting can cause the API call to fail.
Sending the Generated PDF by Email
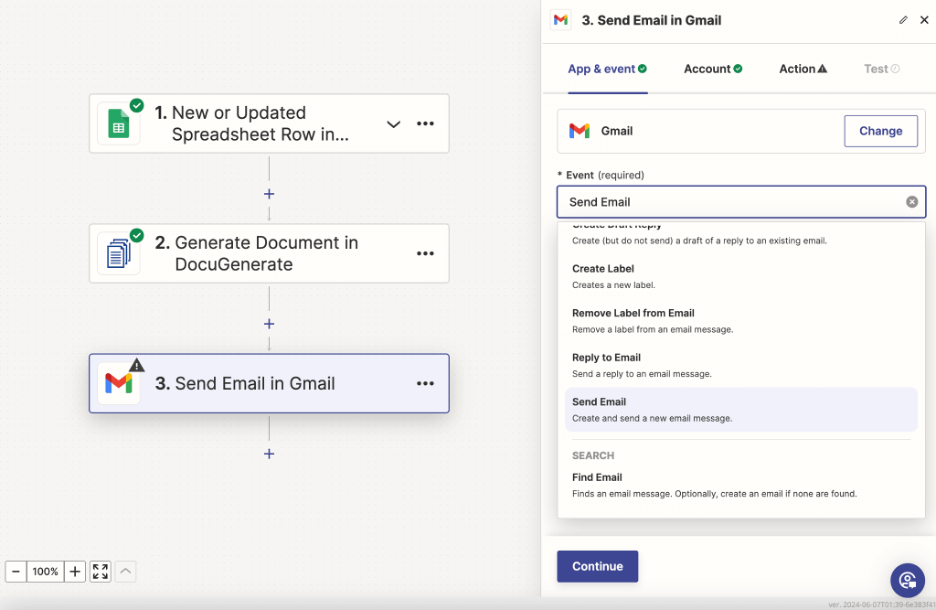
To automate sending the generated PDF invoices by email, add the Gmail app in Zapier and select the “Send Email” action. Connect your Gmail account to Zapier by following the authentication prompts.
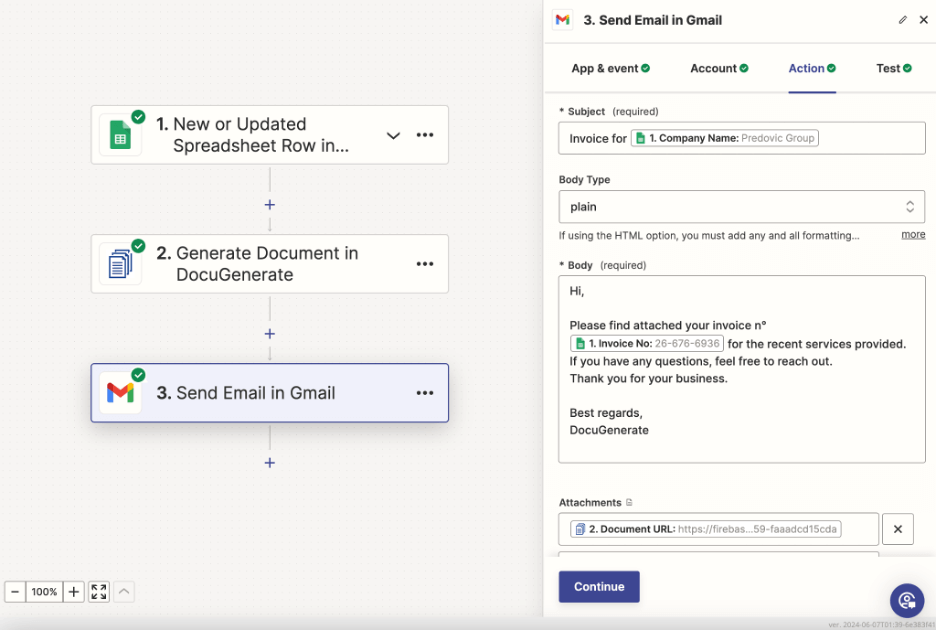
Set up the email by filling in the recipient field with the email address from your Google Sheets data. Use dynamic fields to pull in the recipient’s name for the subject line. Compose a short, professional email message to accompany the invoice attachment.
Attach the generated PDF invoice to the email. You can do this by selecting the “Document URL” field from the Generate Document action as the attachment in the Gmail action. This ensures that each email sent includes the correct invoice.
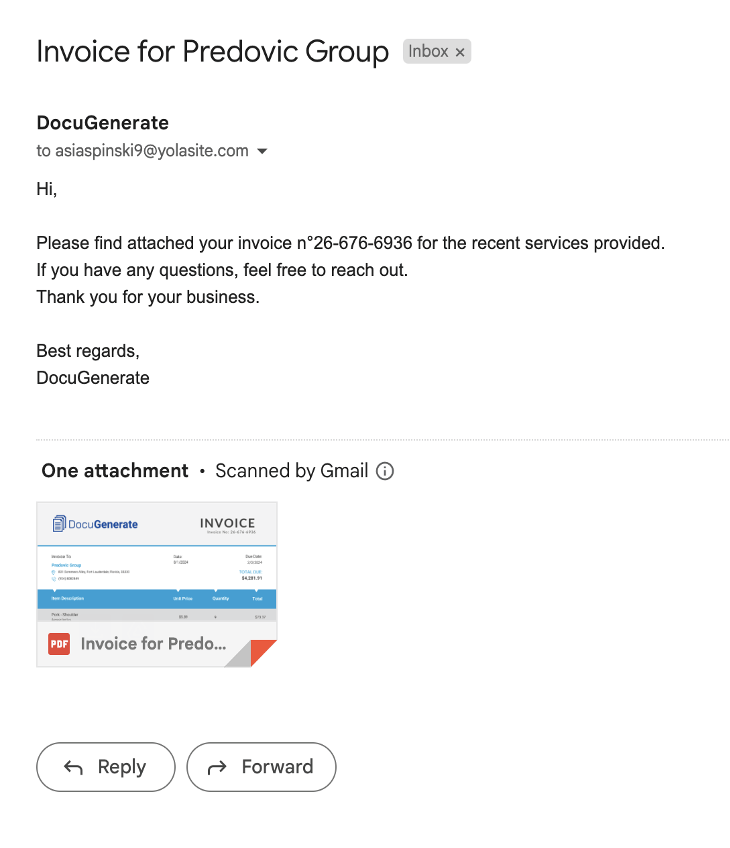
The email should look like this for the selected record. You can see that the email subject is personalized with the “Company Name” value and the generated PDF invoice is successfully attached.
Conclusion
By integrating Google Sheets, Zapier, and DocuGenerate, you can automate the entire process of generating and sending invoices. This setup not only saves time but also ensures consistency and reduces the risk of errors. Whether you’re managing a small business or handling large volumes of invoices, this automation can significantly streamline your workflow.
For more information on handling multi-line data and other advanced features, refer to our article Automate Contracts with Zapier and Google Sheets on the DocuGenerate blog. Additionally, explore the DocuGenerate Zapier integration for more automation possibilities. We encourage you to try out this setup and see how it can benefit your invoicing process.
Post by DocuGenerate Team.
More Readings: